2011年1月15日土曜日

Jacobean Applique Quilt


Back in the days when my eyesight was better I used to be very fond of freezer paper applique, and this is one of the quilts I made at that time.


When I was at Girton College, Cambridge, back in the 1970s, the room used as the Junior Common Room was a wood panelled one, with huge floor to ceiling panels of Jacobean style embroidery all round the room.  Ever since then, I have had a little corner of my mind that is entertained by the weird and wonderful nature of Jacobean design.


I originally intended the strips as borders for another quilt, but decided they looked better on their own. So I turned them into a strip quilt instead.


2011年1月14日金曜日

Knits for babies


I keep a small stock of gifts for babies ready by me to produce when needed. I started doing it many years ago whan I struck a stage when it felt like all my expupils were having babies at once. These are the ones I happen to have by me at present.


2011年1月13日木曜日

Tigger - Baby Pictures


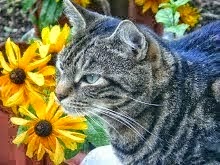
I'm tired today so here are some baby pictures of Tigger.

He came to us at 8 weeks and was such a sturdy little chap, with huge paws. My daughter fetched him right across London on the Northern Line at rush hour. He didn't like being in his box, so she took him out and sat him on her lap and he was as good as gold.

I've never seen a kitten grow so fast. His bones grew and grew. Our vet said he has the longest, thickest bones of any domestic pet cat he'd ever seen. Just keeping him fed was a struggle when he was growing so fast. Sometimes he'd be stuffed full, and starving again 20 minutes later!


2011年1月12日水曜日

Housewife update


My replacement sewing machine foot pedal arrived so I was able to finish the housewife I showed you the start of last month.

I followed the Patchwork and Quilting Sewing Kit Purse pattern by and large, but I added my favourite tatted edging all round the outside on top of the binding. Being red on red I'm afraid it isn't clear in the photo.

I also inserted the zip a bit differently to suggested. It is a double ended heavy duty zip as that was what I had to hand.


Inside I reduced the size of the needlecase to allow space for a tin, and rounded the edges to match the tin's corners and the shape of the cover. I also added a strip of bias binding over the bottom of the pocket to reduce bulk (because I didn't need to turn the pocket edge over.)


The removable (on velcro) contents. The pincushion is almost exactly like the pattern. The needlecase has added tatted decoration. The flower is just rings with lots of long picots worked close together. The flower centre is just loose colonial knots embroidered onto the top of the tatting. The green is a long length of spiral tatting stitched down in places. (Spiral tatting is just a chain where instead of using a double stitch you use either the first or the second half of the double stitch repeatedly, twisting the chain in the direction it wants to go so that it forms a spiral.)


The tin is an Altoid tin. I have covered it in a scrap of deerskin and glued a strip of velcro to the base. I find these little covered tins very convenient to hold small items, thimbles, stitch markers for knitting, small buttons and so on. These so easily get lost among larger items.


2011年1月11日火曜日

Wedding Bag and Bouquet


I  made a little beaded bag from some of the left over silk because I remembered the inconvienence at my own wedding of not being able to take so much as a handky with me.  The basic design of the bag was by a Japanese designer, whose book I cannot at the moment lay my hands on. The usual case of it not being where I thought it was!


And here is the bouquet I made with a combination of tatted flowers and bought in sprays.


It is the shape it is because the bride was tiny and would have been dwarfed by a spray. Also it works either way up, pointing up or down.

My daughter would, I know, want me to add that she is not married. This was my treat, to make a dress etc that she may one day, if she wants to, wear. I was unable to make my own wedding dress as my father's serious illness meant we had to bring the date forward very sharply to be sure he could be there before he went into hospital. But I always wanted to make a wedding dress, so I did. The whole thing, including accessories took almost exactly 6 months working on it for some hours every day. I enjoyed every minute of it. And I will not be offended if she decides never to wear it. I've had the pleasure of making it.


2011年1月10日月曜日

Wedding Dress - Tatted - Part 4


We have finally reached the train, which has a lot of tatting on it.


Apologies again for it being a bit creased. I couldn't face ironing it!


Again, you can see how pearl beads have been sewn on over the tatting.


The hem has a line of small beads. This disguises the actual line of the hem, adds a little weight to keep it in place, and catches the light attractively.


Another of the motifs on the train.


One of a pair of little birds I have a better photograph of this but the computer has decided that my own photograph, of my own work, taken with my own camera and dowloaded into my own computer, is a serious risk to its security and it won't let me use it! And today I can't be bothered to argue with it.


Edgings used to pull the motifs together, again with beads added afterwards.

Next time I will show you the bag and the bouquet of tatted flowers.


2011年1月9日日曜日

Wedding Dress - Tatting - Part 3


Here is the front panel from the bodice.

I started by tatting a piece to fit the required shape. Then I layered  a piece of net, the silk fabric and a calico support in an embroidery frame and stitched the tatting down. After that, I stitched down masses of beads. Only then did I mark out the pattern and cut out the panel. This is important because all that sewing pulls the fabric in enough to make a noticable difference. If you cut it out first it would be too small by the time it was ready to use in the dress.


You can see here that I also outlined the seams with tiny beads and the neckline with pearls.


The waist had my favourite tatted edging.


You can see here how I built up the beads on top of the tatting. Adding beads to tatting as it is worked and sewing beads down on top of  plain tatting give different results. For one thing, sewing them on afterwards let you fill in rings with a bead, it also lets you use larger beads than would be convenient for a large piece.


Here is a close up of the 3D flowers that edge the upper back. The flowers were made individually as this gives more wriggle room for making them fit perfectly. The pearls were sewn on afterwards.


Another view of the back edge. The back too had net above the silk. The buttons I covered myself with the silk of the dress. For anyone who has never done this, it is surprisingly easy once you have had a little practice.

More next time!