
I got the bag finished yesterday and I'm very pleased with the result.
I carried on with the lining and stitched the two layers together at the top of the drawstring section. I made icords and put them in. For the top, I increased in alternate stitches all round and worked to longer than the bag top. I cast off fairly tightly on the lining and fairly loosely on the bag as the lining had far more stitches. Then I matress stitched the two parts together. As the upper layer was longer and fuller than the under layer, this caused the seam to sit under the top and let the blue section blouse over - which was the effect I was aiming at.
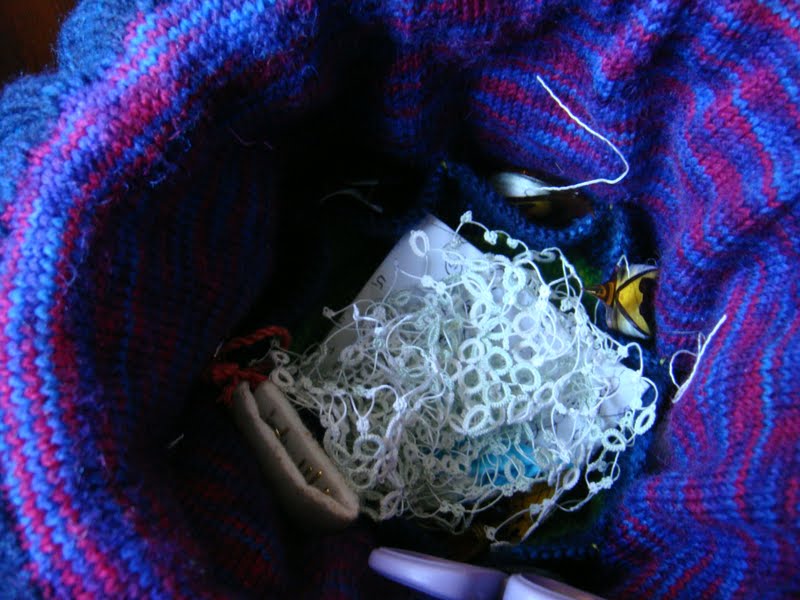
Here is the bag with tatting installed, spare shuttles, scissors etc. in the pockets and the tatting and pattern in the centre.

As you can see, the bag has considerable stabilty - it is empty in this photo.
What I was trying to show with this project is that - once you understand how knitting works - you don't need a pattern for something like this. I started with a basic idea - I wanted a really special bag for my tatting, a dolly bag type, using a cd in the base as that is a suitable size. That really was all I started with - just a rough idea in my head. I didn't put anything on paper. And after the first 8 stitches to start the base I never counted stitches or measured anything in centimetres, I just worked until the base would fit the cd and the pocket flap would fit my shuttles - everything beyond that was just judgement - and how much of each yarn I had!
I have enjoyed watching your methodical approach to this project. I am not sure I have the technology to replicate it yet, it looks very useful.
返信削除