2011年5月31日火曜日

Comfort!


An album picture from when Tigger and Ginger were still young. They were completely unrelated and different ages, but they have always got on so well with each other.


2011年5月29日日曜日

Cheer up!


Despite being almost June, it is miserably cold, relentlessly windy and the skies seem to be dark grey far more of the time than is reasonable. I've got an eye infection and a cold - which seems unfair at this time of year. And the search for a ginger kitten is going nowhere. I begin to wonder if there just isn't a ginger kitten with my name on him out there.

So I needed cheering up, and what could be more cheerful than a big yellow lupin and a lovely pale pink rose!


2011年5月27日金曜日

needlepoint Bag


Another from my albums this time. I made this a good many years ago and still use it regularly. It was a kit and a Kaffe Fasset design. It is a really good big bag - I use it to store yarn that I expect to need in the near future. I enjoyed making it very much and I still enjoy using it. Cushion covers are lovely but they wear out - this bag seems to go on for ever! It is lined with a heavy-duty calico.


2011年5月26日木曜日

Birthday Yarn Scarf - finished


I finished my birthday yarn scarf yesterday and it is beautiful. The pattern is Bluebird Lace Scarf by Kara Peterson.


The yarn was a strand of a yarn from  http://www.kingbecky.com/ put together with a strand of very fine silk yarn I already had. The kingbecky yarn is very discretely shaded - beyond the capacity of the camera to show. The result looks as if it has been made in a solid colour but the slight variations catch the light differently so it looks even better in real-life than in the photo!


2011年5月25日水曜日

Choosing yarn


When I saw the Dockside Cardigan pattern by Amy Miller in Interweave Knits Summer 2011 it struck me as a pattern my daughter would like. As her birthday is in the autumn it seemed like a good idea to make it for her. But, there was a problem - the yarn is not, as far as I could tell, available in the UK. Kind people on ravelry told me it is a sock yarn, but when I looked at alternatives available over here I couldn't find anything I thought my daughter would actually wear.

Yesterday, computer problems - now fixed by a kind friend - left me with some unexpected free time, so I dived into my yarn stash and looked to see what I could find.

I have a lot of coned industrial yarn, bought from a closing down sale of someone who was retiring. Industrial yarns have a lot of advantages. For one thing, even if you don't get them at sale prices they are usually cheaper than balled yarn. Then there is more choice. And, best of all, they tend to be thin so all sorts of combinations are possible. I even find that, being oiled, they keep my hands nice when I am knitting with them!

I looked out 2 yarns my daughter would like. The one on the left is a dark navy 90% lambswool 10% cashmere, but I didn't have enough of it. I also had plenty of a lovely dark slate (on the right) 90% silk 10%  cashmere.


I was tempted to use the dark slate, but the tension of the pattern was quite loose and drapey - which I knew my daughter would like.  If I used a yarn with such a high proportion of silk it would have no memory to speak of and would tend to droop rather than drape. Having thought about it, I put 2 strands of the silk yarn with 1 of the thicker lambswool and worked a sample.


Being oiled yarns, I had to wash the oil out before I could check guage and feel. The camera has struggled with the colour - it is much darker than it looks. But you can see how the sheen of the silk and the matt of the wool have worked to give interest to the fabric. The guage is spot on and the fabric has elasticity - it springs back when stretched - thanks to the lambswool. And it has the right lightness and drape. The only downside is that I will need to work the pattern in daylight to be sure of avoiding mistakes.


2011年5月23日月曜日

Roses


I love roses! The one above is gorgeous though it has the inconvenient habit of insisting on flowering only well above head height.


This one is a great favourite. It was in the garden I grew up in and had probably been planted about 1939. It is a climber but not impossibly vigourous and flowers profusely. The flowers start pink and pale to white.  We brought rooted cuttings of it when we moved here, only to find a beautiful specimen already in situ! The only other place I have seen it is in a garden in Scotland. As all seem to have been planted about the same time I suspect it is a rose that would have been very popular but for the interruptions of the war.


And this too is a rose - a wild rose. Isn't it amazing to think that this is the sort of thing that has been developed into the roses we have today!


2011年5月22日日曜日

Finished! - Knitted bag for tatting


I got the bag finished yesterday and I'm very pleased with the result.

I carried on with the lining and stitched the two layers together at the top of the drawstring section. I made icords and put them in. For the top, I increased in alternate stitches all round and worked to longer than the bag top. I cast off fairly tightly on the lining and fairly loosely on the bag as the lining had far more stitches. Then I matress stitched the two parts together. As the upper layer was longer and fuller than the under layer, this caused the seam to sit under the top and let the blue section blouse over - which was the effect I was aiming at.


Here is the bag with tatting installed, spare shuttles, scissors etc. in the pockets and the tatting and pattern in the centre.


As you can see, the bag has considerable stabilty - it is empty in this photo.

What I was trying to show with this project is that - once you understand how knitting works - you don't need a pattern for something like this. I started with a basic idea - I wanted a really special bag for my tatting, a dolly bag type, using a cd in the base as that is a suitable size. That really was all I started with - just a rough idea in my head. I didn't put anything on paper. And after the first 8 stitches to start the base I never counted stitches or measured anything in centimetres, I just worked until the base would fit the cd and the pocket flap would fit my shuttles - everything beyond that was just judgement - and how much of each yarn I had!


2011年5月21日土曜日

Colour!


I still need a little more time to get the bag finished, so here are a couple of poppy flowers and a rose bud from my garden this week.


2011年5月20日金曜日

Knitted Bag for tatting - nearly there.


Yesterday I made good progress. I got the pocket section sewn to the lining at 8 points. Having done that it was possible to finish the base. I inserted 2 cds, shiny sides outwards as this looks pretty through the knitting. Then I could sew up the opening.


Here you see the inside with the pockets formed and the base in place.


And the outside of the base.


Then I was able to continue the lining until I was level with the start of the eyelet section.


I could then have picked up around the body and knitted the 2 layers together but that forms a slight line on the knitting, which I did not want. Instead I stitched the 2 layers together, picking up at intervals all around and keeping it loose enough not to pull the knitting.


Here that is completed.


2011年5月19日木曜日

Knitted Bag for Tatting - The lining 1


I went back to the base and picked up between the pocket strip and the body. If I had originally planned to do this I would have worked 3 purl rounds on the base instead of 2. Then I could have picked up the middle one at this stage.

Linings are normally made a little smaller that what they are to line, but in this case I want the lining to add stability so I have increased to slightly more than the bag body. Making it a little larger will help with the shape. People nowadays tend to assume that the main way to add stability to a bag is to felt it, but as you can see there are other ways too.


When I have worked a bit more than the depth of the pocket flap I will sew the flap to the lining at 8 points, level with the 8 increase/decrease points of the base. This will give me 8 pockets for tatting shuttles. You can see that I have placed pins where the sewing will go.


2011年5月18日水曜日

Knitted Bag for Tatting - Part 3


I couldn't get these photos to load yesterday so here they are today.

I worked the body of the bag as far as the drawstring section. At that point I worked a purl round, a knit round and another purl round. Then three knit rounds.


Then the eyelets. Because I am using sock yarn and fine needles a simple yarn over and decrease would produce too small a hole. So I worked a pair of decreases with 3 yarn overs between them. On the next round when I came to the three yarn overs I knit the first one, dropped the middle one and purled the third one. This makes a good eyelet and is a method I sometimes use for buttonholes. Then I continued, matching the pattern to finish the drawstring section.

Originally I intended to work straight to the top edge, work a turning round and continue forming a facing. However at this point I had what I hope will be a better idea. So, I increased one stitch per eyelet, worked straight for a few rounds and then changed to a 2.5mm needle, continuing straight until I ran out of the green yarn (this bag is using up several sock yarn left-overs.) I then left the stitches on the needle as I have not quite decided how I  am going to deal with them at the end.

More when I have made some more progress! 

2011年5月16日月曜日

Knitted Bag for Tatting - Part 2


At this point I picked up one stitch in each stitch of the purl round nearest the side with the opening.

Working in seed stitch I increased 2 stitches at the centre of each of the 8 segments.


Here you can see the base with the seed stitch pocket section begun and the remaining purl round visible - that will be used later.


I worked in seed stitch until I had sufficient for the pocket section - in this case, until it was tall enough to hold an upright tatting shuttle. I then cast off - this is one situation where the instruction to cast off loosely does NOT apply. I wanted to cast off at the same tension as the seed stitch so the pocket top would not stretch in use.

Then I went back and picked up all round the remaining purl round, but increasing 1 stitch for every 2 stitches picked up except where the 8 sections met each other (these areas I just picked up straight with no increases). With the purl side towards the seed stitch section I was now able to work the body of the bag in stocking stitch.

 More later.


2011年5月15日日曜日

Knitting a bag for tatting - One


Here is the base of the bag I am knitting. I am using sock wool and 2mm needles.

 I started by making a circle of 8 stitches - as I showed last time. Then I increased at 8 points on every other round - in this case by adding a yarn-over. This creates a pretty swirl pattern.

As I am planning to stiffen the base with an old cd, I knitted until it was the right size. Then I worked 2 purl rounds (these come in handy later!)


Then I continued working back and forth on half the stitches, as set, but working a decrease (in this case K2B) on alternate rows at the same 8 points. I worked to the last 4 stitches, drew the yarn through them and pulled it up.


Then I did the same thing on the remaining stitches - this gives an opening to put the cd in. It is sewn up afterwards because it is easier to continue knitting without putting the cd in until the end.

More next time!


2011年5月14日土曜日

Knitted centre for a circle - photo-tutorial


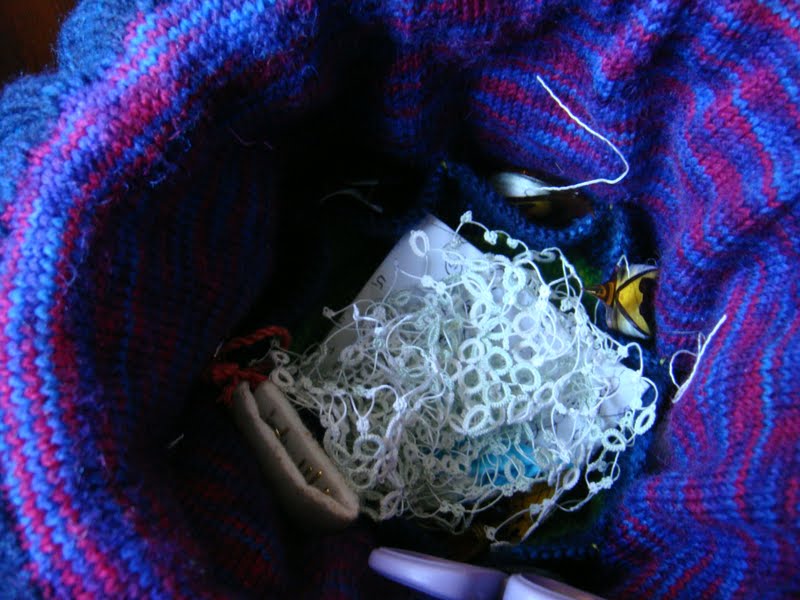
The above is a photo of a bag I have started to make (more on that later) and it occurred to me that it might be worth showing how I start a circle. I'm sorry the photos that follow are not perfect - it is hard to hold the work with one hand and the camera with the other!


To make things easier to see I am using a thick yarn and large needles.

Start by laying the yarn over your left hand with the end  at the bottom front.

Take the yarn over the back of the hand and up to the top again. You now have two strands over the front of your hand and are going to work over them both.


Now pick up a loop of yarn (from the ball).

 Pull the loop under both hand threads so you have just that loop on the needle.


Now pick up another loop of new thread.


Take that loop through the loop you already have on the needle (dropping that first loop).

One stitch complete!


Pick up another loop by going under the original double thread. It helps to remember that you are working towards the first end of the thread.


Take that thread through to form a second loop on the needle.


Here you see the first stitch and the second loop on the needle.


Pick up another loop.


Pull that through that second loop. Now you have two completed stitches on the needle.


Now you can continue until you have the number of stitches you require - in this case 8.


Now you can pull on the free end of thread and start snugging the centre.


Now you can divide the stitches between your needles and finish snugging up the centre.


2011年5月12日木曜日

Chilly Day


It has turned chilly here again so I thought we would have some more pictures from my garden. Here is the first lupin.


And an aquileigia - not the rather dull purple kind, but an almost white one which I am happy to see has seeded itself around the garden.


And the ultimate in anticipation - a poppy bud.